Backyard BBQ Grilling Tips, Tricks & Recipes From the Experts
Enhance your nature landscape with these sweet-smelling backyard BBQ menus!
One thing quarantine won’t be able to stop this spring is breaking out the backyard BBQ grills to add to our natural outdoor landscape design! At Ryan Lawn & Tree, we love hardscaping BBQ grills right into our backyard patio designs. But either way, we know that grilling with family and friends and enjoying your outdoor space are the highlights of everyone’s spring, summer and fall! To help get your grill on, we’ve reached out to some competition BBQers for their best tips, tricks and recipes that even the most novice backyard BBQer can try!
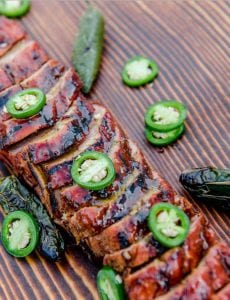
Grilled Pork Tenderloin with Jalapeno-Apricot Glaze
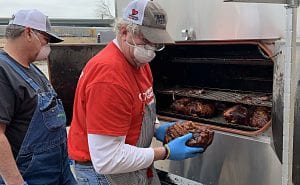
Our search began with the folks at Operation BBQ Relief who have been working tirelessly the last several weeks to feed those impacted by COVID-19. This BBQ community continues to come together in times of need — serving people in Kansas City (pictured left). The organization works nationwide to connect, inspire, serve, educate, and feed communities in need. The recipe below is pulled straight from their 352-page cookbook. Need more great recipes from the more than 70 competition teams from across the country who are included? Buy the cookbook — all proceeds go to help the organization help others.
Spicy, sweet, very moist and easy to prepare — you’re going to love these pork tenderloins. They turn out wonderfully tasty with an awesome array of flavors from the rub and glaze.
YIELD: 3 servings | Cook Time: 10-12 minutes
3 tbsp (60g) apricot preserves
3 tbsp (60g) jalapeño jelly
3 tbsp (44ml) rice wine vinegar
1-2 tbsp (15-30 ml) agave syrup
1 jalapeño, diced small, optional
1 shallot, diced small, optional
MEAT
1 lb (454g) pork tenderloin
2 tbsp (30g) your favorite pork rub
1. To make the glaze, heat all of the glaze ingredients together in a small saucepan over medium heat, being careful not to burn it. Stirring constantly, bring to a boil and remove from the heat. Keep it warm for basting and for a dipping sauce.
2. Using a knife, trim the silver skin, along with any loose fat, from the pork tenderloin. Apply a coating of your favorite pork rub to all sides of the meat.
3. Set your smoker or grill to 300ºF (149ºC), direct cooking.
4. Place the tenderloin on the cooking grate. Place the lid on the grill and cook for 90 seconds. Remove the lid, rotate the pork loin a quarter turn and cook for an additional 90 seconds. Repeat this cooking process until the tenderloin reaches an internal temperature of 125 to 130ºF (52 to 54ºC) in the thickest area before you start to apply the glaze. There is a large amount of sugar in the glaze, so make sure to move the pork loin to the coolest area of the grill
5. Apply several layers of the glaze to the tenderloin. Once the thickest part of the tenderloin reaches 138 to 140ºF (59 to 60ºC), pull it off the grill. Tent the loin with foil and let it rest for 5 to 8 minutes. Reserve the remaining glaze and keep it warm.
6. Slice the pork tenderloin on the bias and serve with the remaining glaze as a dipping sauce.
This is great with grilled pineapple, apple coleslaw or your favorite side dishes.
—— Submitted By County Line Smokers via Operation BBQ Relief — FB: OpBBQRelief | IG: OpBBQRelief | Twitter: OpBBQRelief
Wabash BBQ Candy-On-A-Bone Rib
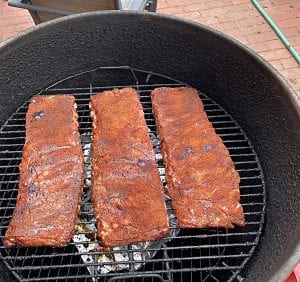
Co-owner Jim McCullough has taken his competition team across the country to compete for and win top prizes at a variety of sanctioned BBQ events. His secret to amazing ribs is out as he shares his step-by-step process for preparing and cooking St. Louis cut ribs on his gateway drum smoker that is an important part of his outdoor landscape design! He accents his smoker with pecan and applewood. McCullough says if you don’t have a smoker, a Weber backyard BBQ grill with a lid could do the trick as long as you offset the meat, not cook it directly over the fire. Like many good cooks, McCullough doesn’t measure any of his ingredients — so sprinkle and layer as directed and as your tastes dictate!
1. Start with a slab of St. Louis-style ribs (you can ask for these at your local grocery store.)
2. First, peel the membrane off the back of the ribs. Then cut the piece of meat flap that is also on the back of the ribs. “I like to cut both ends off to square up the slab — just for looks,” McCullough said.
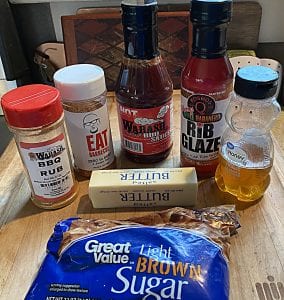
3. Shake a combination of Wabash BBQ Rub and Eat Barbecue’s Zero to Hero rub generously on the backside of the ribs and let sit for 30 minutes. Then, flip the ribs over and repeat on the front side of the ribs. 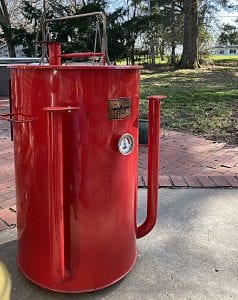
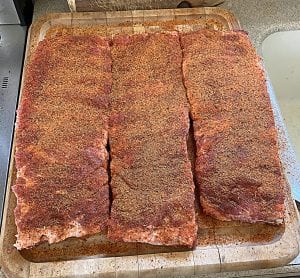
4. Put your ribs on your pre-heated smoker bone side down. “We cook hot and fast at 300º,” McCullough said. While cooking, spritz them with Parkay butter (you can buy this in a spray bottle.)
5. Once your ribs are a nice, golden brown (usually about two hours), pull them and prepare to wrap them in aluminum foil. “We have a saying — wrap on the color and pull on the feel,” McCullough explained.
6. Lay out your sheet of foil and on top of the foil, sprinkle a layer of light brown sugar and then two thin strips of salted butter, cut lengthwise. Then, lay your ribs on top of that, bone up. Next, add brown sugar and butter on the bone side in the same manner. Then, add a layer of honey and Kosmos’ Cherry Apple Habanero Rib Glaze before wrapping the ribs tightly and putting them back on the smoker, meat side down.
7. Smoke for one more hour or until the meat temperature reaches 200º to 205º, then pull and let ribs rest wrapped for 20 minutes. Unwrap the ribs, remove from foil and brush on a combination of pre-heated 25% Wabash Hot and 75% Wabash (regular) BBQ sauce.
8. Unwrap ribs, cut and serve.
“Get ready for some delicious fall-off-the-bone ribs!” McCullough said. “They will taste like candy on a stick!”
—— Submitted By: Jim McCullough, Wabash BBQ — FB: WabashBBQ | IG: WabashBBQ1 | Twitter: WabashBBQ
Prosciutto-Wrapped Scallops with Wood-Grilled, Charred Corn Piquillo Pepper and Jicama Salsa with Cilantro Sauce
“I started out securing sponsorships, cooking the party meat, and chilling, and partaking of the adult beverages,” Wilson said. “After accepting the invitation to join the team, I was looking forward to the 1998 season. In January 1998, my brother Tom passed away and it became a mission for me to carry on his name.”
And carry it on she has. Wilson’s competition team has won numerous awards across the country. Her son started competing in Kids Que when he was five, competed with his best friend on their own team and has now joined TheSlabs.com. You may have seen Wilson compete on 2018’s “Chopped Grill Masters,” having won Kansas City’s Chopped Grill Masters Champion title and representing K.C. on the finale! Wilson shared one of her favorite recipes along with several Pro tips to help your family enjoy outdoor dining at its best!
SCALLOPS
8 soaked skewers
2lbs scallops, approximately the same size, muscles removed and pat dry
1/4 lb. thinly sliced prosciutto
1. Season scallops with The Slabs Perk Up Your Pork Rub on the top and bottom sides.
2. Cut prosciutto slice into four even strips, lengthwise. Do this for as many scallops as you have. Use one strip to wrap around one scallop. Skewer 1/8″ from the end of the wrapped prosciutto, placing two scallops per skewer. If your skewers are too long, snip excess off with kitchen shears.
3. Fold a paper towel. Use your tongs to dip into oil to grease grids. Grill scallops on medium coals for approximately 2-3 minutes per side.
3 ears of corn, soaked in water for two hours SHUCK ON
4 Pickled Piquillo Peppers, diced
1 pound jicama, peeled & diced
1/4 cup chopped red onion
1/4 cup chopped cilantro
1/4-1/2c fresh lime juice
1. On the hot side of your backyard BBQ grill, grill corn in the shuck, turning every five minutes, for approximately 25 minutes. If parts of the husk burn, peel it off with tongs and discard.
2. Using gloves, peel back the husks and return corn to the grill, turning to get char. Using the peeled back husk as a handle, cut off the top to square it off. Placing the top flat on your cutting board sliding your knife down the cob to get the corn off.
3. In a medium bowl mix corn, jicama, peppers, onion and cilantro.
4. Add lime juice one tablespoon at a time to get the consistency you prefer, you don’t want excess liquid. Salt and pepper.
CILANTRO SAUCE
1/4 c extra virgin olive oil
Juice of 1 1/2 limes
2 garlic cloves
1 tsp sea salt
1 whole bunch of cilantro, washed
1. Place lime juice, cilantro and garlic in a food processor, or blender, blend until smooth. Add salt and olive oil blending until incorporated.
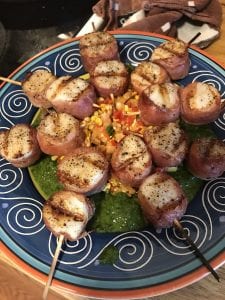
2. Using a large platter, place salsa in the center, surround with cilantro sauce then lay the skewers on top in a circle.
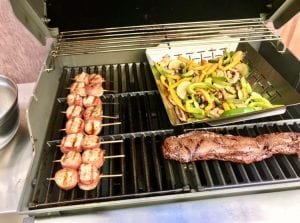
- When using a charcoal grill for your backyard BBQ, put coals on 2/3 of the grill allowing 1/3 as your “safety zone”. If you get flare-ups or a fire, you have the safety zone to put your food on so it doesn’t go up in flames. Same with a gas grill, leave one section off to have a safety zone.
- Prior to grilling/smoking/cooking meats (beef, chicken, pork, etc.)….. bring them to room temperature. Think about it: when you’re cold, your body tenses up, when you get somewhere warm you loosen up. For starters, your item won’t take as long to cook. Secondly, you have a better chance of your item being the same temp THROUGHOUT for even cooking.
- When grilling vegetables, marinate/season the cut up veg in a big bowl an hour before grilling. Use a grill topper so they get the flame but don’t fall between the grids. Save excess marinade in a squirt bottle to apply to veg while grilling.
- NEVER use meat marinade while grilling UNLESS you boil it first!!! I recommend making extra marinade that you set aside, so you don’t have to worry about cross-contamination.
- When you plan on grilling kebabs, soak the skewers for at LEAST an hour prior to using so they don’t turn into kindling. You can also wrap the “handle” portion of the kebab in foil.
- Seafood needs some fat added to it or it will dry out while grilling. Bacon & prosciutto are my top two go-to’s. You could also baste with butter.
—— Submitted By: Stephanie Wilson, TheSlabs.com— FB: TheSlabs | IG: theslabs.com_bbq_team | Twitter: @theslabs
Backyard BBQ Grilling Tips From Paul
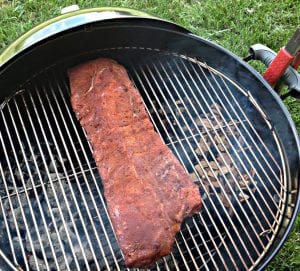
“I started out just using my kettle grill made by Weber,” Aubrey said. “Eventually, I bought a barrel smoker from a neighbor when he upgraded to a pellet smoker.”
Though he said he’s never had the time to perfect his craft in order to compete, he loves spending time in the natural landscape of his backyard with his grill when he finds an evening or a Saturday where his schedule is empty and he can spend hours tending the fire, socializing with whoever drops by (when we could still do that), and just generally enjoy the outdoors.
“It’s kind of a peaceful, rejuvenating experience,” Aubrey said. “I love working with pork. I believe the pig is the most delicious of all animals. It’s also a pretty forgiving meat. I perfected my ribs, and a good pork butt is hard to beat (on the bone, preferably). My wife prefers smoked chicken and veggies, so I work that in too.”
Aubrey is offering up his three best tips that a new griller or smoker may not think about!
Tip 1: When using a rub, cover the meat with it to the point you’re afraid you’ve put too much on. Then put on a little bit more.
Tip 2: Don’t fear using foil. Wrapping ribs in foil — after letting them smoke for an hour to two hours — keeps them moist, and gives you super tender meat with just enough cling. I like to remove them from the foil after an hour or two and then sauce them, letting the sauce caramelize for about 30 minutes.
Tip 3: If you BBQ a lot, consider buying your meat through a meat distributor, rather than a grocery store. You’ll
l end up buying a lot more meat at a time because they sell by the case, but you’re avoiding the grocery store mark-up. If you’re going to be smoking a lot of meat, you may as well get it cheap!
—— Submitted By: Paul Aubrey, Backyard BBQer Extraordinaire
Pig Shots & Classic Sweet Cornbread
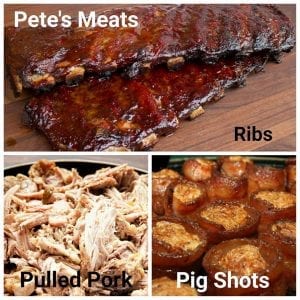
“For the most part, it is just a hobby as I enjoy the science of BBQ and cooking in general,” De Groot said.
Here he is divulging the recipe for his amazing Pig Shots appetizer and a tasty BBQ side dish you can make on your backyard BBQ grill!
SMOKED PIG SHOTS
Ingredients
1 lb of thick-sliced bacon (about 10-12 slices per pound) Look for bacon that is uniform in shape and as close to a rectangle as you can find.
1 link of smoked sausage, kielbasa, etc.
8 oz cream cheese, softened
1 bag of Mexican 4 cheese blend, 8 oz
¼ cup of your favorite BBQ rub ( a rub that is sweet and spicy works best )
1 cup of dark brown sugar
Toothpicks or bamboo skewers
Instructions
1. Cut the link of smoked sausage into ½ inch pieces. These will be used as a base structure for the shot glass shape.
2. Cut the slab of bacon in half. Try to keep the bacon as cold as possible while constructing the “shots”. This will make it easier to put together
3. Wrap a half slice of bacon around a piece of smoked sausage and secure all the way through with a toothpick. Alternately, you can fit 6 “shots” on a bamboo skewer. This makes them much easier to transport and handle on the smoker.
4. Place the pig shots on a Weber grilling pan, Bradley rack, or even a wire cooling rack for ease of transport to and from the smoker.
5. Dust the interior of the cups with 1 TBS of your BBQ rub.
6. Place the “shots” in the refrigerator while mixing up the cream cheese filling mixture.
7. Combine the cream cheese with 3 TBS of your BBQ rub, and at least 3 big handfuls of shredded cheese. Using a stand or hand mixer thoroughly mix the ingredients.
8. Spoon into a quart-sized Ziploc bag. Snip off a small corner at the bottom for piping the cream cheese into the “cups”.
9. Pipe cream cheese filling into the cup until it’s just below the top of the bacon. DO NOT overfill!
10. Using a spoon pack the pig shots with brown sugar until it reaches the top of the cup. It works best to do this over the sink or another pan for easy cleanup.
11. Set up your smoker for cooking at about 295°F with indirect heat and a light fruitwood such as apple or pecan for smoke. If your smoker uses a water pan, fill it up. Be sure to line the drip pan with tinfoil to catch anything that runs out.
12. Place the pig shots on a Weber grilling pan, Bradley rack, or even a wire cooling rack and place that into the smoker for about 90 minutes or until the bacon has a good eating texture, the cheese is melted and the brown sugar has caramelized.
13. Remove the pig shots from the smoker and serve immediately.
CLASSIC SWEET CORNBREAD with GOLDEN CRUST
Using a pre-heated cast iron skillet gives this moist and sweet cornbread a beautiful golden crust. This recipe is designed for a 12” cast iron skillet. If using a smaller skillet, use the remaining batter to make cornbread muffins.
Ingredients:
¾ cup unsalted butter
¾ cup white sugar
3 eggs
1 ¾ cup buttermilk
¾ teaspoon baking soda
1 ½ cup cornmeal
1 ½ cup all-purpose flour
¾ teaspoon salt
Directions:
1. Preheat oven to 375 ˚ and place a seasoned 12”cast iron skillet inside.
2. Melt butter in the microwave (approximately 40 – 45 seconds). Once melted, combine with white sugar in a large bowl. Beat eggs in a small bowl, then thoroughly combine with butter mixture.
3. Stir baking soda into buttermilk and add to the mixing bowl.
4. Combine cornmeal, flour and salt together in a separate bowl, and then slowly stir into wet ingredients. Combine thoroughly to form a thick batter. (If batter is too thick, add additional buttermilk, 1 tablespoon at a time, to achieve desired consistency).
5. Carefully remove preheated skillet from the oven with potholders or oven mitts, and pour prepared batter into the pan. Using a rubber spatula, smooth batter to an even depth.
6. Preheat Skillet in the oven at 425 degrees to warm it up. Then reduce oven temperature down to 375 degrees. Spray Skillet with Pam or butter all over. Cook for approximately 25 to 30 minutes.
7. Bake until the center of the cornbread is firm and use a cake tester or toothpick test to make sure it comes out clean.
—— Submitted by: Pete De Groot, Pete’s Meats — FB: Petes.Meats01/ | Email: [email protected]
Let Ryan Lawn & Tree Create Your Perfect Backyard BBQ Nature Landscape
We can’t wait for you to try these recipes and tips on your backyard BBQ grill! Let us know which ones you liked best by tagging us on social media @ryanlawntree! And, if you’re needing help creating that outdoor landscape design, contact your RYAN Pro today! Our Outdoor Living Team is standing by to help sketch and implement a backyard design of your dreams that could include a built-in backyard BBQ grill, fire pit and outdoor water feature! Learn more about our landscaping services by visiting the Midwest location nearest you in Kansas City, St. Louis, Tulsa, Springfield or Wichita. Our experienced Pros will have you enjoying backyard BBQs in no time!

